
The added fresh pandan juice posed a challenge to kneading the dough by hands. It seems to hinder the formation of glutens, which caused the dough to disintegrate easily. But an extended kneading time will slowly overcome it :)
Yield: 20x10x16 cm loaf
Weight: 554g
Pandan juice
70g water
20g pandan leaf
Blend the two ingredients in a powerful food processor or blender for about 30 seconds.

Keep the juice in an air-tight container and store in the fridge till needed.

Ingredients
20g concentrated pandan juice 浓香兰汁
100g whole milk 全脂牛奶
40g coconut cream 浓椰浆
20g condensed milk 炼乳
3/4 tsp instant dry yeast 即发酵母粉
270g bread flour 高筋面粉
20g top flour 低筋面粉
40g fine sugar
30g multigrain soya pulp 五谷豆渣*
30g beaten egg 蛋液
1/4 tsp salt 盐
30g unsalted butter 无盐奶油
Some beaten egg for glazing 蛋液
* you may replace the multigrain soya pulp by 20g whole milk and 10g top/cake flour
* 可将五谷豆渣以20g 全脂牛奶和10g 低筋面粉取代。
Directions
1. Add pandan juice, whole milk, coconut cream, condensed milk to a heat resistant bowl. Keep warm the mixture in the rice cooker for about 5 minutes.
If the temperature of the mixture exceeds 38 degree Celsius, allow the mixture to cool down before adding yeast.


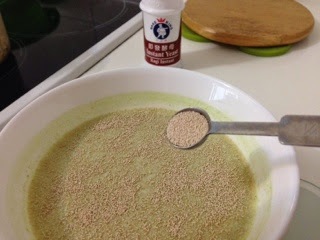
2. Sprinkle instant dry yeast over the milk mixture without stirring it. Let the mixture stands for about 15 minutes to activate the yeast.

3. Mix the rest of the ingredients, except yeast milk mixture and butter, in a mixing bowl.

4. Pour in the yeast milk mixture from (2). And stir the mixture in one direction till it forms into a lump.


5. After the 20 minutes rest, turns the dough onto a floured work top.
Knead the dough by slamming - pulling -folding and turning in repeated steps till the dough becomes smooth. This process takes about 5 to 10 minutes.
As the dough is quite sticky, wearing a pair of disposable CPE gloves would make handling of the dough easier.


6. Spread out the dough and apply softened butter onto it. Knead to incorporate butter into the dough.


7. When the butter has well incorporated into the dough, repeat the slamming-pulling-folding and turning steps till you get an elastic dough. This process take about 15 to 20 minutes.


8. Place the dough in a lightly greased mixing bowl, spray some water, cover, and allow the dough to proof for 1 hour, or till the dough doubles in size.


9. After the proofing, invert the dough onto a floured surface. Flatten the dough with your palm to released the trapped air.


10. Fold in the four sides to the center.


11. After the rest, sprinkle some flour over the dough, and flip it over.


12. Roll up the dough starting from the shorter end.


13. Lower the dough into the mould, spray some water, and let it proof in a closed oven for about 1 hour, or till the dough reaches the rim of the mould.


14. Remove the dough and mould from the oven, and start to preheat the oven to 180 degree Celsius.
Brush beaten egg over the top surface of dough.

Baking time varies depending on individual oven.


16. After the bread has baked through, remove the mould from the loaf immediately. Allow the loaf to cool down on a cooling rack.

17. Slice the loaf after it has completely cool down :)


Thank you for sharing and I have successfully made breads and buns for my family. May I know how you slice your bread so nicely and evenly?
ReplyDeleteHi YokSan, I happy to know that you enjoy baking for your family, hooray 🎉
DeleteI sliced my bread using a saw blade bread knife I bought from Metro :)